Feeds:
Posts
Comments

Posts Tagged ‘ricrac’

Lately I have been using “seed beads” to embellish my scrapbook pages and projects. I do not “string” the beads. I adhere them! I have been asked many questions about this so I decided to make it the topic of my August Tutorial for SNS.
What are seed beads? 
Here is a Wikipedia link: http://en.wikipedia.org/wiki/Seed_bead that gives a great explanation and a photo. I buy my beads wherever I see some that strike my fancy. Usually, they are quite low cost.
Here is a photo of some beads I have on hand:

Endless variety is available in colour and type of seed beads!

  Here is a layout I created using seed beads: 

Photo credit: Pam Sandy”]

Photo A

Papers: Reminisce and BasicGrey’s Dasher Collection  

Seed beads: Clear glass and red glass  

Beads were used to enhance paper design, accent the flowers,  and pinpoint the snowflake centres   

Close-up view:  

Detailed view of clear & red glass seed beads”]

Photo B

How- to:  

1. First gather your supplies.   

– Glossy Accents by Ranger  

– Small container for your seed beads (Here, I’ve used a tiny fast-food BBQ sauce tub that I washed out and saved.)  

– Beads of your choice  

– Your project~  I have decided to embellish a journaling tag for this tutorial.  

NOTE: You will also want something such as waxed paper to cover/protect your work area.  

Supplies needed to add seed beads to an embellishment

I use Glossy Accents by Ranger as my bead adhesive.   

Why?

I prefer Glossy Accents because it  has a fine precision- tip applicator, adheres things where I need it to, and adds a clear, hard coating  that is shiny when it dries. 

Additionally, it is ACID FREE!  

Glossy Accents by Ranger

 2.  Apply a small dab of Glossy Accents where you wish to adhere a bead to your project.  

Applying a dab or "drop" of Glossy Accents

3. Then move your applicator tip over to your little tub of beads. Dab the tip of applicator onto the bead you want, “catching it” on the tiny amt of adhesive that it already on the tip.  

"Catching" a bead with tip of applicator

 4. Move applicator, with the caught bead, over to the dab of Glossy Accents on your project. Touch the bead to the adhesive on the project. The bead will go into place:  it seems to “release” from it’s position on applicator’s tip. This works best if the applicator tip has only a tiny amount of adhesive on it- and the dab on your project is larger- effectively pulling the bead off the applicator. (Try this- you will see what I mean! LOL)     

"Caught" seed bead is moved into place.

  5.  You can also use Glossy Accents in this way to adhere  a line of beads, as seen in photo B]. Work in a 1-inch long line.  

Just work a little more quickly, being sure the line of adhesive you have applied to the area does not start to dry out.  

If it does, reapply.  Glossy Accents works on curved lines in the same way!  

Sample shows Glossy Accents used to adhere seed beads on curved lines

6. Don’t worry: the Glossy Accents adhering the beads will look “wet,” but only for a few minutes! Allow to dry flat.    

Looks "wet" but will dry quite fast to a glossy, hard finish.

 7. All dry and ready to use on  your Layout!

Ready to use on a scrapbooking project

Other ideas for using seed beads: 

1. Stickles and cardstock flower-shapes can be covered in beads, then sealed with Glossy Accents to embellish the centre of a  handmade flower, as seen here:

Note Stickles, cardstock floral center & seed beads, sealed with Glossy Accents

2. Use a rounded “pile” of seed beads sealed with Glossy Accents to enhance a flower:

Floral centers using seed beads in different types of faux flowers. Ric Rac seen here is from the SNS August 2010 "Summer Adventures" Ribbon Kit

 Light yellow ric rac from August 2010 Ribbon Kit.  Link to this  beautiful “Summer Adventures” Kit is HERE.

3. Use a fine line of beads to accent a detail on patterned paper ( in this case a fern leaf): 

Beads can accent a fine line on your patterned paper

Yellow satin-edged organza and ric rac from August 2010 Ribbon Kit.  Link to this  beautiful “Summer Adventures” Kit is HERE.

 4. Use your beads to accent an embellishment, in this case a butterfly:

Butterfly wings sparkle with the addition of clear glass beads!

5. Embellish a cardstock medallion with concentric rings of beads to accent its’ pattern:

Cardstock medallion embellished with seed beads

6. Polka-dotted patterned paper becomes a 3-D  background when beads are adhered to it to accentuate its’ visual impact:

"Astilbe: Front Garden" created with SNS August 2010 Ribbon Kit- "Summer Adventures"

 Deep melon-red satin-edged organza ribbon from August 2010 Ribbon Kit.  Link to this  beautiful “Summer Adventures” Kit is HERE.

Have fun with those seed beads and “Thanks” for visiting us here at the SNS Blog today for this scrappy “How-to” all about seed beads! Come back soon!

Read Full Post »

The SnS August kit is so well named…..” Summer Adventures”. The ribbons just cry out to be used with your summer photos but it doesn’t stop there because they are so versatile.

I’d like to share my layouts with you now.
First Dip

I used a technique of making Serendipity squares on this LO which is my challenge for you this month so please go check that out in the forum.
I tied ribbon around the squares and used strips of ribbon and attached them with some brads.

Cute

I used the cute little yellow ric rac ribbon as the string to make my banner on this page about my cute grandnephew Evan.

Catch A Wave

On this page I wanted to bring the focus to the right side of the page to balance the big wave on the left. To do this I used the aqua ric rac ribbon as a vertical line between the papers.
I used the yellow ric rac to underline my journaling.

Play All Day

For this page I wanted to bring the eye down from the title and photos
to the journaling and flower embellishments.
I ran a strip of ribbon horizontally across the page and “cinched” it in periodically with some brads.
Having fun in the pool tires little boys out!

Dude

I used some of the sheer yellow ribbon to make a bow and tie on my “Memories” charm.

2 In The Bed…

A favourite thing of mine to do with ribbon is ruffle it. It gives your page so much added dimension.
The polka dot ribbon went perfectly with my patterned paper!

Fun In The Sun

I love how the ribbon bow gave my octupus some added fun and whimsy!

Joy @ 55

Yes that’s me and I’m 55! Ack!!
I used the polka dot ribbon to make leaves for my handmade flowers. Just loop the ribbon and adhere underneath the flower.

I hope you enjoyed my projects this month. The ribbons are so amazing!
You can find all supplies used and closeups of my pages in the gallery.

Read Full Post »

I can’t even tell you how much I love this kit! Such a fun fun kit for summer! And it’s only $3.50 – think how much you can add to your summer crafts with this inexpensive kit! (Click on the image above to purchase.)

Echo Park paper, stickers, and alphas. MS border punch and label. Ric rac and ribbon from August kit.

ricrac from August kit, American Crafts stickers, Twinery twine and label, Cosmo tiny type alphas, Basic Grey chipboard and paper, 7Gypsies sticker, cinder glimmer mist, acrylic paint

acrylic paint, WRMK rub ons, AC thickers, ribbon from August kit

7Gypsies stickers, Cosmo Cricket papers and chipboard, AC thickers, ribbon and ric rac from August kit

Read Full Post »

Check out this beautiful and fun summery kit!  Just click on the image above to purchase.  Also, keep an eye out for creations from the design team coming soon.

Read Full Post »

This fun kit really inspired me to do some fun beach pages.  I love these beautiful cool colors!  Just click on the image above to purchase this kit.

Sweet Sweet Summertime

Supplies: Pink Paislee papers and border sticker and glitter brads, MM alpha stickers, Cosmo Cricket tiny type alphas, SNS ribbon and trim from the July kit, Prima flower, paints, unknown menu card and cardstock.

Techniques: the bright yellow cardstock is washed with ivory and white paint to give a softer color and texture, paper edges are distressed with scissors blades, cut out popsicles from paper and popped on 3D foam for an embellishment.

Place of Peace

Supplies: Cosmo Cricket and various paper scraps, MM and Pink Paislee and 7Gyspies stickers, Cosmo Cricket tiny type alphas, AC rubons, Kaiser Craft flowers, various buttons, ribbons and trim from July kit, handmade organza ruffle

Techniques: I cut and then gathered and hand sewed a ruffle from a strip of pale blue organza.  I love how it echoes the ocean waves/foam.

Pillow Fight

Supplies: October Afternoon papers, MS border punch, MS label, AC thickers, Ribbon from July Kit and SNS store, Prima flowers, unknown button, mixed AC Thickers

Techniques: I chose to keep this layout very clean and simple since the photos are so manic.  🙂

The Mantsch Clan

Supplies: Crate and Pink Paislee papers, Prima and various other flowers, Various buttons, Pink Paislee papers, Cosmo Cricket tiny type alphas, American Crafts Thickers, Prima leaves, ribbons from July kit

Techniques: I created grosgrain ribbon springs by wrapping the ribbons around a chopstick and then baking until they held their shape.

Tide Pool Fun

Supplies: Bo Bunny and October Afternoon and Basic Grey papers, American Crafts thickers, Cosmo Cricket tiny type alphas, Brides flowers, trim from July kit

Techniques: For the little flower centers I used AC vinyl thickers pieces that never get used off of my sheets – the periods.

Travel Journal

Supplies: Cosmo Cricket papers, Paper Studio and Cosmo Cricket alphas, SIS gaffer tape, unknown button, ribbon from July kit

Happy Card

Supplies: Cosmo Cricket papers, American Crafts thickers, ribbon from July Kit

Read Full Post »

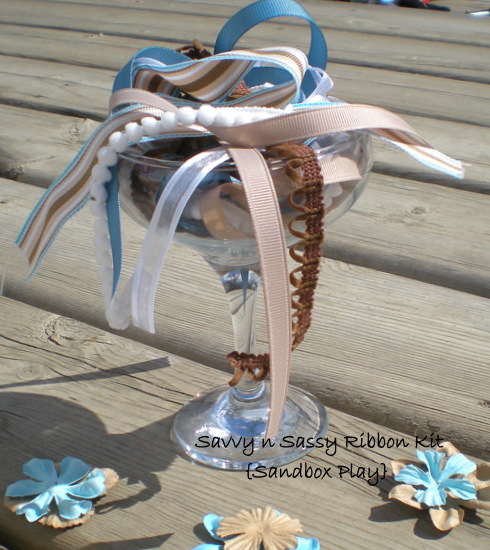
Check out the new July ribbon kit, called Sandbox Play!  Keep an eye out for new projects showcasing this kit from the DT throughout the month.  Just click on the image above to purchase.

Read Full Post »

Here are Holly’s creations with the fun June kit.  Just click the image above to purchase.

FLOOD 2010
SNS June Ribbon Kit
Craft paper
BG scraps
handmade transparency flower
Onion net
Foam thickers
MM tiny alphas
misc. velvet button
INK

“3” ‘s a CHARM
SNS June Ribbon Kit
Basic Grey paper
Assorted buttons
Love Elsie paper
Tim Holtz tiny staples
Heart-unknown

You Make me Grin
SNS June Ribbon Kit
Basic Grey PPrs
Love Elsie ppr
Yellow cardstock
Apple Net
Prima Flowers

To be YOUNG again
SNS June Ribbon
Unknown bg paper
Assorted flowers
Assorted buttons
Thickers
MM tiny alphas

Look Mama
SNS June Ribbon Kit
SH June Petite paper kit
Blue Alphas-unknown

Kids at PLAY
SNS June Ribbon Kit
SH Petite paper kit
Scrap papers
MM tiny alphas
Other Alphas –Unknown

Read Full Post »

Here are Holly’s projects using the gorgeous April ribbon kit.  Just click on the above image to purchase.

Read Full Post »


Sweet Ryan
Ribbons from April Kit
Prism Cardstock
Lily Bee & Recollections pp
MS punches
MM & AC stickers
AC chipboard
Kaiser Rhinestones
Prima flowers


Sunday Best
Ric Rac from April Kit
Bazzill Cardstock
AC & Scribble Scrabble pp
LYB Stickers
Embellishments from Maya Road,Sassafras,MM,K&Co.
Emb. floss
Glimmer Mist


Thankyou Card
Ribbon from April kit
SU cardstock,stamp & embossing powder
K&Co pp
Ranger dimensional pearls
Versamark


Card
Ribbon from April Kit
MS punch
Prima Bling
Stickles
Everything else from SU


Best Wishes
Ribbon from April Kit
Chatterbox button
Everything else from SU


Hello
Ribbon from April Kit
SU cardstock
Scribble Scrabble pp
Nestabilities
ColorBox ink
Prima flowers
Chatterbox button
Fiskars stamp

Read Full Post »

Kate and Grace: October 2009

PHOTO CREDIT: Kim Marshall

“April Skies” April SnS April Ribbon Kit

Patterned Paper: K&Co Blue Awning

Flourish: K&Co

Flowers: Prima Essentials 5 “Artful Collage”

Handmade flowers: EK Success scallop punch, scissors, ink, Glue dots

Dye Ink: Darice- “Ink it up!” Khaki green

“Genuine leather” tag: ephemera

Buttons, pink oval stone and shell beads: Vintage

Font: Partridge

Altered “Ideas Folder” created to match office wallpaper border

“April Skies” SnS April Ribbon Kit

Folder: NS Dept of  Education

Patterned paper to cover folder: BasicGrey

Motif: cut from Imperial Wallpaper Border

Flowers: Prima Essentials 5: “Space Boy” and “Artful Collage”

Flowers:  Handmade- as above

Ink: Darice- “Ink it up!” Navy blue

Buttons: Vintage

Ride: Kate and Oakley, 2007

“April Skies” SnS April Ribbon Kit

 Striped  1/2″ grosgrain ribbon: previous SnS Kit

CS: Bazzill

Patterned papers: Piggy Tales “Little Boy Blue” and “Gingerbread Man” Collections

Flourishes: Bazzill

Title lettering: unknown

Numbers: Flair “Take a Number” 

Handmade Flowers: as above

Dye Ink: Darice- “Ink it up!” Chocolate brown, and “Memories” black

Buttons: vintage

"Tremont World's Fair: Ride"

“April Skies” SnS April Ribbon Kit

CS: Bazzill

Green background paper: Piggy Tales

Corner shaper: CM

Patterned papers: Upsy Daisy designs

Rub-on flourish and sub-title: Kelly Panacci

Lettering- Forever in Time

Dye ink: Versamark- Caramel

Handmade flowers: as above

Buttons: Vintage

LO is based on a Sketch by Deanne Burton, from her “Just my Sketches” blog site.

Detail showing black mini pom-pom trim

Thanks for having a peek at these creations from the beautiful “April Skies” SnS  April Ribbon Kit!

Read Full Post »

Older Posts »